SQLITE NOT INSTALLED
Deciding to dye your hair at home is a moment of agency and creativity. It’s also a little like stepping into a small chemistry lab: color, developer, timing and technique all determine whether you walk away with salon-worthy shine or a lesson learned the hard way. This article walks you through the full process—what to know before you buy a box, how to select the right shade, step-by-step application, how to fix common mishaps, and how to keep color looking fresh for weeks. Read on for practical, specific advice that helps you achieve consistent, healthy-looking results without unnecessary risk.
Why people choose DIY hair coloring
For many, the appeal of coloring hair at home comes down to cost and control. A salon appointment can be expensive and often requires scheduling in advance. Coloring at home is more affordable, faster for routine touch-ups, and gives you the flexibility to experiment with shade intensity or subtle changes. People who want to maintain a signature color between salon visits or nudge their look toward something new often find DIY the best fit.
There’s also a creative satisfaction in doing it yourself: mixing color, observing how it develops, and seeing the finished look unfold. That said, home coloring is not always a direct substitute for professional work—complex changes, dramatic lightening, or corrective color are best handled by an experienced colorist to avoid damage or uneven results.
Know your hair before you color

Hair structure and why it matters
Hair is composed primarily of keratin with three layers: the cuticle (outer), cortex (middle), and sometimes the medulla (center). Most color change happens in the cortex, where natural pigment resides. Bleaching lifts the cuticle and removes pigment from the cortex; depositing color typically fills or coats the cortex. The condition of your cuticle—whether it lies flat or is raised—affects how evenly hair accepts and retains color.
Porosity, elasticity and how they affect color absorption
Porosity describes how readily hair absorbs moisture and chemicals. High-porosity hair has raised cuticles and soaks up dye quickly, often producing darker, more intense color yet also fading faster. Low-porosity hair resists moisture and may require more processing time or specialized products to accept color evenly. Elasticity tells you if hair is healthy: hair that stretches and returns indicates healthy keratin strands. Fragile, barely elastic hair is at higher risk of breakage during chemical processing and needs gentler techniques.
Existing color and chemical history
Previous dyes, relaxers, keratin treatments or heavy use of hot tools alter how new color behaves. Semi-permanent dyes sit on top of the cuticle and can influence how permanent dyes take; permanent color or bleach changes the pigment baseline and affects lift and deposit. If your hair has been colored multiple times or chemically treated, expect more variation in results and consider a patch or strand test before full application.
Color basics: Levels, tones, and undertones
Understanding basic color theory prevents many surprises. Colorists use a level system from 1 (black) to 10 (lightest blonde) to indicate darkness. Undertones—the red, orange, or yellow pigments within hair—become apparent as you lighten. When hair is lifted, warm undertones appear: dark brown often reveals red; medium brown reveals orange; dark blonde reveals gold; light blonde reveals pale yellow.
Tones are what you add to neutralize or enhance those underlying pigments. Ash and violet tones counteract brassiness; gold and warm tones enhance warmth. Choosing a color without considering the natural level and undertone often leads to an unexpected result. For example, trying to achieve an ash blonde from a level 4 brown without pre-lightening will likely fail or produce a muddy outcome.
Tools, products and materials you’ll need
Preparation reduces stress during application. Gather the essentials and set up a well-lit, ventilated space where you can move freely. Here’s a practical checklist:
- Color kit or professional hair color and developer (volume appropriate to the goal)
- Mixing bowl and applicator brush
- Plastic gloves and old towel or cape
- Sectioning clips and wide-tooth comb
- Vaseline or barrier cream for the hairline
- Plastic cap or cling film (for heat retention if needed)
- Timer and a mirror (and a hand mirror for checking the back)
- Pete (strands) for patch/strand tests and a clarifying shampoo
- Deep conditioner or bond-repair product for aftercare
Box dyes often include gloves and developer and are a convenient, all-in-one option for beginners. Professional color and developers allow more precise control of ratios and volumes. If you choose professional products, follow manufacturer mixing ratios—incorrect dilutions are a common source of uneven processing.
Choosing the right dye and shade
Match shade to your skin tone and lifestyle
Think beyond just “I like this image.” Your chosen shade should flatter your skin’s undertone and fit your routine. Cool-toned shades (ash, platinum, blue-based browns) typically suit cool skin undertones; warm shades (copper, golden blondes, warm browns) flatter warm undertones. If you’re undecided, pick a shade within one or two levels of your current color to minimize surprises.
Semi-permanent vs. permanent vs. demi-permanent
Semi-permanent dyes coat the hair and fade gradually; they’re low-commitment and good for trying new shades or enhancing color. Demi-permanent penetrates slightly deeper and lasts longer without full lift. Permanent color lifts and deposits pigment and is the only option for significant lightening or complete gray coverage, but it requires the most care and can be more damaging.
For subtle changes or experimenting, start with semi- or demi-permanent. For gray coverage or major color shifts, permanent color is often necessary—apply carefully or consult a professional if you’re unsure.
Patch and strand tests: non-negotiable steps
Always perform a patch test at least 48 hours before applying an oxidative dye. This quick step checks for allergic reactions to the product. Apply a small amount behind the ear or on the inner elbow, leave it for the recommended time, then rinse. If you notice redness, itching, swelling or pain, don’t use the product. Some reactions appear late—if in doubt, consult a medical professional.
A strand test shows how long the dye will take, how the hair will lift or deposit, and whether the final color matches expectations. Use a clean, representative strand from the crown—mix and apply the dye exactly as you will for the full application, timing it carefully. The strand test helps you adjust developer volume, timing, or decide if pre-lightening is required.
Preparing your hair the week before
Preparation begins before you open the box. Avoid washing your hair the day of application; natural oils protect the scalp and help reduce irritation. However, if you use lots of styling products or oils, clarify 48–72 hours before coloring to remove buildup that can block even color absorption.
Deep conditioning or bond-building treatments used a few days prior help strengthen hair and reduce damage during processing. If your hair is dry or brittle, give it a few treatments in the week leading up to dye day to improve elasticity and resistance to breakage.
How to read a color box and product labels
Color boxes are full of marketing language—don’t be misled. Look for the shade level and tone numbers, developer volume required, whether the product covers gray, and whether it’s permanent, demi- or semi-permanent. Ingredient lists reveal ammonia, peroxide, or alternative alkalizing agents; ammonia helps lift cuticles, while ammonia-free formulations are gentler but sometimes less effective at dramatic lifts.
Manufacturers also list processing times and aftercare recommendations. Follow those timelines during your strand test and initial application, but be prepared to adjust slightly based on hair porosity and previous color history.
Step-by-step: Applying permanent hair color at home
Below is a careful, detailed sequence ideal for an all-over color change from one shade to another when no major lift is required. If you are lightening significantly, consult the section on bleaching and lightening later in the article.
- Set up: Wear old clothes, lay out tools, and protect surfaces with towels or newspapers. Keep a timer nearby.
- Mix: Combine color and developer in the bowl using exact ratios. Mix until smooth and no lumps remain.
- Divide: Section hair into four or more parts—crown, two sides, and nape—pin each with clips for control.
- Apply to roots first: Roots process faster due to scalp heat. Use the brush to paint color onto the root area about half an inch wide, working around the head.
- Process: Start your timer according to strand test results and product instructions. If you have previously colored hair, consider applying to mid-lengths and ends after a short time to avoid over-processing.
- Comb through for even distribution: If the product recommends, use a wide-tooth comb to blend the color from roots to ends after initial root processing to prevent banding.
- Rinse and treat: Rinse with lukewarm water until water runs clear. Use color-safe shampoo and the included conditioner or a bond-repair treatment to seal the cuticle.
- Dry carefully: Air-dry or use a low-heat setting. Heat styling immediately after can stress newly colored hair—give it a day if possible.
Small variations—like applying color to dry vs. damp hair—have different effects. Dry hair allows more consistent application and sometimes more lift; damp hair can spread color more evenly. Follow your product guidelines and the outcome of your strand test.
How long to leave color on and why timing matters

Manufacturer processing times are not arbitrary. Under-processing can leave pigment from the developer insufficiently deposited; over-processing risks excessive lift, dry hair, and breakage. Products designed to lift hair require stronger developers and controlled timing; depositing-only formulas are gentler. If in doubt, err on the shorter side during your first attempt and check progress periodically.
Lightening and bleaching: proceed with care
Lightening hair to achieve blonde requires lifting natural pigment, usually with bleach (lightening powder and developer). This is the most damaging chemical process hair can undergo and should be approached conservatively. Expect multiple sessions to reach very light levels if starting from dark brown or black hair, spacing sessions several weeks apart to allow hair repair.
Use bond-building additives (often sold as “olaplex” alternatives or professional bond multipliers) when bleaching. They help protect and rebuild the hair structure during and after chemical processing. Follow safe developer volumes—20 or 30 volume for moderate lift, 40 volume increases risk of damage and is not recommended for inexperienced users.
How to perform a safe bleach application
- Assess whether pre-lightening is necessary based on desired result and current level.
- Perform strand tests to determine timing and degree of lift.
- Mix bleach powder and developer according to product instructions.
- Apply to sections from ends to roots for even lifting, since heat from the scalp accelerates lift at roots.
- Monitor progression every 5–10 minutes; do not exceed recommended total processing time.
- Rinse thoroughly and apply a neutralizing or bond-building treatment immediately.
If your hair is damaged, consider a color deposit instead of full bleaching. If you need dramatic lightening for the look you want, a professional colorist can achieve it more safely with techniques and tools designed to minimize breakage.
Root touch-ups and gray coverage
Root touch-ups are the most common DIY job. For grays, permanent color is usually needed because gray hair is resistant and may not take semi-permanent dyes well. Pick a shade that matches the mid-lengths, and use a smaller applicator brush for precision.
Apply color only to the new growth to avoid over-depositing darker pigment onto previously colored hair. Many find it useful to apply color to the root area and leave it shorter than the full processing time before blending down the rest of the hair slightly to create a seamless transition.
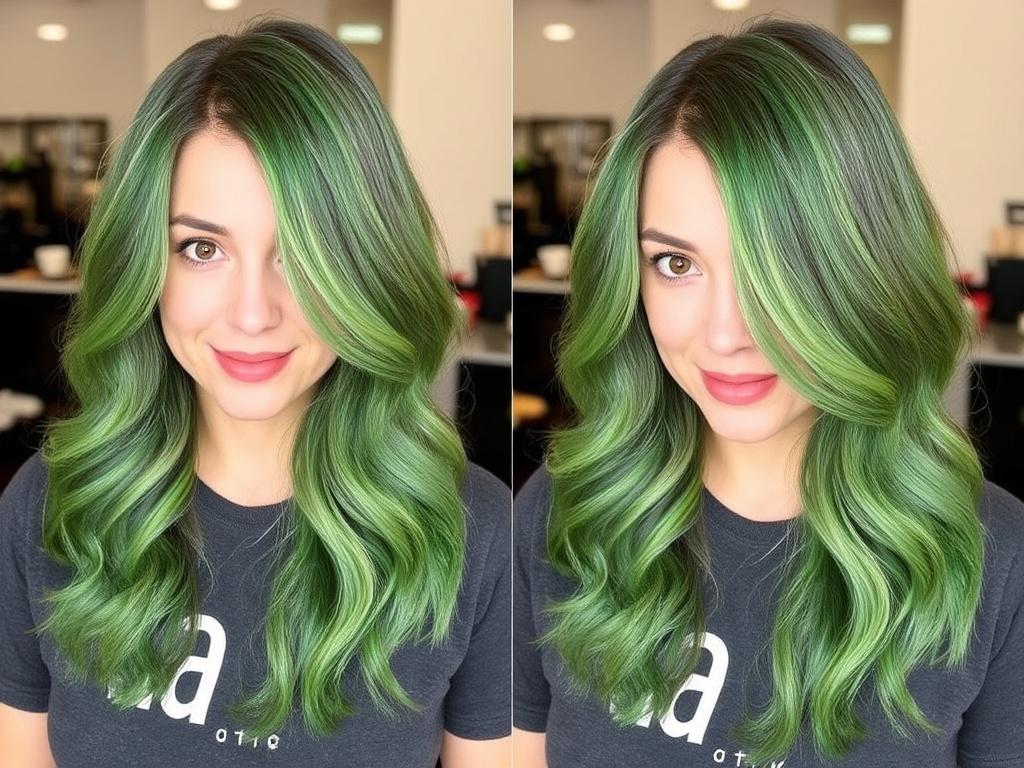
Coloring techniques at home: highlights, balayage, and more
Some techniques like single-process all-over color are straightforward at home. Others—balayage, foil highlights, subtle dimensional work—require more skill but are achievable with patience and the right approach. Balayage is a hand-painted, sun-kissed technique that is forgiving because it typically features soft transitions and darker roots. Highlights need even sectioning and controlled application to avoid striping.
If you are attempting highlights at home, use small sections and proper tools (foil, cotton, or highlight caps), and practice on an inconspicuous section first. Consider a pre-lightened effect with a lower developer strength to avoid harsh banding and aim for gradual lift to mimic salon results.
Tools and techniques for even results
- Sectioning is key. Work in thin, consistent slices for highlights or broader panels for base color.
- Use a tail comb for precise parting and consistent sections.
- Apply color from scalp to ends when rooting and from mid-lengths to ends for glossing.
- Check progress in a well-lit area; natural light gives the best sense of true color.
- Rotate your parting and directions when applying to the back—use a hand mirror to spot-check.
Rinsing, conditioning and sealing color
Rinsing is more than removing dye—it’s the moment you check whether color is even. Rinse with lukewarm water until water runs almost clear. Avoid shocking hair with very hot water: heat opens the cuticle and can accelerate fading. Apply the conditioner supplied in the kit or a protein-balanced, color-safe conditioner to lock cuticles and improve shine.
For processed hair, use a deep conditioning treatment or a bond-repair mask within 24–48 hours to restore moisture and elasticity. These treatments help hair hold color better and reduce breakage.
Aftercare: routines that preserve color and hair health
Color fades through washing, UV exposure, heat styling, and chemical interactions. Adopt a supportive routine to keep color vibrant and hair strong:
- Use sulfate-free, color-safe shampoos and conditioners formulated for your color type.
- Wash with cooler water to preserve pigment.
- Limit washing frequency; dryshampoo can extend time between washes.
- Use leave-in conditioners, heat protectants, and bond-repair treatments regularly.
- Avoid daily high-heat styling and select lower temperatures when blow-drying or flat-ironing.
- Protect hair from sun and chlorinated pools with hats or UV sprays.
Fixing common hair-dye problems
Even careful applications can produce issues. Here are common problems and practical solutions that you can try at home.
Uneven color or patchiness
Cause: Uneven application, inconsistent sectioning, or varying porosity. Remedy: Apply a color refresher or professional color glaze to even out pigment; targeted reapplication to specific sections can help. For severe unevenness, a colorist can blend and correct without further damaging hair.
Brassy or orange tones after lightening
Cause: Residual warm undertones showing after lift. Remedy: Use a toner containing violet or blue pigments to neutralize orange or yellow tones. A purple shampoo between toning sessions reduces brassiness over time.
Color too dark
Cause: Developer too strong, color deposited too dark, or natural pigment wasn’t lifted. Remedy: Clarifying shampoos and repeated washing gradually fade the color. Color-removing products can strip artificial pigment more quickly but may stress hair. Follow up with deep conditioning and consider professional correction for dramatic removal.
Green tint after swimming
Cause: Copper and chlorine in pool water reacting with lightened hair. Remedy: Use a clarifying shampoo and chelating treatments that remove mineral buildup. Rinse hair promptly after swimming and wet hair with clean water before entering the pool to reduce absorption of chlorinated water.
Over-processed, brittle hair
Cause: Excessive chemical processing or high volumes of developer used repeatedly. Remedy: Stop chemical services and focus on repair: protein treatments, deep conditioning, and regular trims to remove the most damaged ends. In severe cases, a colorist may recommend cutting hair to protect remaining healthy fibers.
Color correction: when DIY isn’t enough
Color correction covers a wide range of services—from removing unwanted tones to lifting and reapplying color for a new result. Corrections often require a sequence of lifts, toners, and conditioning steps that are difficult to predict without professional training. If you face multiple issues at once (e.g., uneven lift plus brassiness plus breakage), visiting a skilled colorist is the safest route. Professionals can use tailored protocols and bond-repair systems to minimize damage while correcting the color.
Transitioning gradually: going lighter or darker in stages
Major changes are gentlest on hair when done gradually. If you want lighter hair from a dark base, plan multiple sessions spaced weeks apart with restorative treatments in between. Conversely, going darker can often be done in a single application but choose a shade close to your natural level to avoid a heavy, flat appearance. Adding lowlights or dimension helps make a darker change look natural.
DIY foil highlights: a careful approach
Foil highlights create defined streaks and brightness. At home, use thin, consistent sections and fold foil neatly to prevent leakage. Apply bleach or lightener to the mid-lengths and ends first, then roots, because roots lighten faster. Monitor every few minutes and remove foils when the desired lift is reached. Mistakes here are visible, so practice on a small section first if you’re new to foils.
Balayage at home: the forgiving alternative
Balayage’s hand-painted nature offers a softer regrowth line and is often more forgiving for DIYers. Focus on feathered strokes, vary the amount of product on the brush for softer edges, and keep roots darker for a low-maintenance look. Use a lightener with a lower developer and perform multiple, careful passes if you need more lift—don’t overdo a single session.
At-home glossing and toning for quick refreshes
Glosses and semi-permanent toners are ideal for refreshing shine, neutralizing brassiness, or deepening tones without strong lift. They deposit color and seal the cuticle, adding shine and smoothing texture. Use a gloss between major color sessions to extend the life of your color and maintain healthy appearance.
Comparing cost and time: salon vs. DIY
Many people choose DIY to cut costs, but time and potential correction costs factor into the total. Here’s a general comparison:
| Service | Typical Cost (DIY) | Typical Cost (Salon) | Time Required (DIY) | Skill Level |
|---|---|---|---|---|
| All-over color (permanent) | $8–$25 (box dye) | $60–$120+ | 45–90 minutes | Beginner–Intermediate |
| Root touch-up | $6–$20 | $35–$75 | 30–45 minutes | Beginner |
| Highlights/Balayage | $15–$60 (products) | $80–$300+ | 1.5–4 hours | Intermediate–Advanced |
| Bleach & toner (major lift) | $20–$70 | $150–$400+ | 2–4+ hours (may be multiple sessions) | Advanced/Professional recommended |
These figures are approximate and depend on brands, regional salon pricing, and your hair’s length and density. Remember that correcting a DIY mistake at a salon typically adds to cost and time.
Reading product ingredients and choosing gentler formulas
Ingredient awareness helps you choose products aligned with your hair goals. Ammonia raises the cuticle for lift; some alternatives (ammonia-free alkalizers) are gentler but may not lift as well. Peroxide is the oxidizer and determines lift when paired with developer volume. Modern formulas often include conditioning agents, oils, or bond-protectors to reduce damage.
Look for sulfate-free shampoos to reduce color stripping, and consider brands that include built-in conditioners or bond repair technology if your hair is fragile or previously processed. If you have scalp sensitivity, seek gentle formulations and always perform a patch test.
Eco and ethical considerations
Many consumers prefer products that are cruelty-free, sustainably packaged, or contain fewer harsh chemicals. “Natural” dye alternatives like henna or plant-based colors can be a great option for depositing color without strong chemicals, but they behave differently and can’t always lighten hair. If you use henna or similar plant dyes, take care: they can interact unpredictably with chemical dyes later. Research product claims and choose reputable brands that disclose testing and ingredient sourcing.
When to see a professional
Certain situations make a salon appointment the wisest choice. If you’re attempting a dramatic lightening from dark hair to pale blonde, correcting severe color damage, or planning a complex multi-dimensional color with highlights and lowlights, a professional can minimize risk and produce a predictable result. Also seek professional help if you experience any severe scalp irritation, persistent burning, or signs of an allergic reaction after a dye application.
Common myths about home hair dyeing—busted

Myth: “You can lift dark hair to very light blonde with a single box dye.” Truth: Permanent box dyes deposit color and sometimes lift a shade or two but cannot achieve strong lightening on dark hair without bleach and professional techniques.
Myth: “Rinsing with cold water seals color forever.” Truth: Cooler water slows fading but won’t prevent it entirely—chemical breakdown, UV exposure, and shampooing all gradually reduce pigment.
Myth: “All-natural products are always safer.” Truth: Natural plant dyes can be safer for some scalps but can interact with chemical dyes in unpredictable ways. Patch tests and careful research remain essential.
Troubleshooting quick fixes—your at-a-glance cheat sheet
- Brassy blonde: Use violet or purple toner or purple shampoo.
- Uneven roots: Reapply color to light areas or use a color glaze for blending.
- Too dark: Clarifying shampoo, multiple washes, or color remover; follow with conditioning.
- Green tint: Use chelating shampoo or a clarifying soak and avoid future copper exposure.
- Faded color: Use color-depositing shampoos/conditioners and reduce wash frequency.
Step-by-step checklist: a practical plan for dye day
- Read the instructions on the product twice and perform a patch test 48 hours prior.
- Perform a strand test to determine timing and expected tone.
- Gather all tools and cover surfaces and clothing.
- Section hair and apply barrier cream around the hairline.
- Apply color evenly, starting with roots for root touch-ups or all-over application if desired.
- Set a timer and check progress as needed; do not exceed recommended time.
- Rinse thoroughly, apply the included conditioner, and follow up with a deep-conditioning treatment within 24–48 hours.
- Use color-safe products and avoid heavy heat styling for the first week if possible.
Maintaining color between appointments
Keep a small supply of color-depositing conditioner or gloss on hand to refresh tone between full applications. Purple or blue shampoos address brassiness for blondes and brunettes respectively. Trim regularly to remove split ends and keep hair looking healthy, because vibrant color is also about the hair’s surface condition. Schedule a deep-conditioning or bond-repair treatment every one to two weeks depending on how chemically processed your hair is.
Color and chemical safety: what to look out for
Any burning, stinging beyond mild discomfort, blistering, or swelling during or after application should prompt immediate rinsing and medical advice. Keep dye products away from children and pets. Follow manufacturer storage recommendations and dispose of leftover chemicals responsibly—avoid pouring large amounts down drains without flushing, and consult local regulations for chemical disposal if unsure.
How to choose a capable colorist when DIY reaches its limits
If you decide to move back to a salon, choose a colorist with credentials, good before-and-after photos for the technique you want, and clear communication. A good colorist will assess your hair’s health, discuss realistic outcomes, and plan steps to reach your desired shade with minimum damage. Consider booking a consultation first to review expectations, pricing, and timing.
Styles and inspiration: translating reference photos to real life
Reference pictures help, but hair color is influenced by lighting, camera filters, and the subject’s natural hair level. Bring multiple images showing different angles and lighting to your session or keep them handy for your DIY attempt. Decide which element you most want to replicate—tone, dimension, or root depth—and adapt your plan accordingly.
Practical tips from experienced DIYers
- Always work in natural light when checking color progression.
- Keep a little of the mixed product aside in case you need touch-ups; mixed color can degrade quickly, but a small reserve helps with immediate corrections.
- Log the formulas, developer volumes, timing, and brand used. If a result pleases you, repeat the process; if it doesn’t, a record helps a professional troubleshoot.
- Start with semi-permanent or demi-permanent to test a new shade before committing to permanent color.
- If you’re nervous about the back, ask a friend for help or use a hand mirror to spot-check frequently.
Frequently asked questions
Can I use a box dye over previously dyed hair?
Yes, but results vary depending on the previous dye and the new shade. If the prior color is darker, lifting may be limited. Box dyes can darken or deposit similar tones effectively. For significant lightening or removing an old dye, professional techniques are usually required.
How often should I touch up my roots?
Root touch-ups depend on your growth rate and desired look. Most people touch up roots every 4–6 weeks. If you favor a more lived-in look, you can extend that time; otherwise plan a routine that maintains the look you enjoy.
h3>Are natural dyes like henna safe for everyone?
Henna and plant-based dyes can be gentler because they don’t use peroxide or ammonia, but they can react unpredictably with chemical dyes and are permanent in their own way. Always perform a strand test and be cautious mixing them with other dyes. If you later want to use peroxide-based lighteners on henna-treated hair, consult a professional because interactions can cause uneven or unexpected results.
How long does salon color last compared to at-home color?
Salon color often lasts longer because professionals use tailored formulas, higher-quality pigments, and precise techniques to ensure even deposit and seal the cuticle. However, at-home color can look equally good initially. Longevity depends more on hair care routine, product quality, and exposure to fading factors than strictly where the color was applied.
Can I mix brands or use a different developer volume?
Mixing brands is not ideal because formulations react differently. If you must mix, prioritize similar developer volumes and perform a strand test. Developer volume affects lift: 10 volume deposits without lift, 20 volume gives moderate lift, 30 volume gives stronger lift, and 40 volume is very aggressive—use caution and follow manufacturer recommendations.
Final thoughts: plan, test, and take care
Dyeing your hair at home can be empowering, cost-effective and rewarding when done with respect for the chemistry involved. The keys to success are realistic expectations, careful testing, gathering the right tools, and prioritizing hair health. Start conservatively—choose shades close to your natural level, do strand and patch tests, and build a restorative aftercare routine. When in doubt, consult a professional for complex changes. With preparation and patience, you can create beautiful, lasting color that reflects your personal style without sacrificing the quality of your hair.
If you want tailored guidance—such as how to choose developer volume based on your exact current level, or a shopping list for a specific technique—I can lay out a step-by-step plan for your hair type and target shade. Just tell me your current hair level, any previous treatments, and the look you want to achieve.