SQLITE NOT INSTALLED
Welcome! If you’ve ever admired models, celebrities, or friends who seem to have perfectly shaped, balanced eyes that can carry any look—from subtle daytime glow to dramatic evening intensity—there’s a good chance they have almond-shaped eyes. This article is a complete, friendly, and practical guide to enhancing almond eyes with makeup. I’ll walk you through the theory, preparations, tools, multiple step-by-step tutorials, troubleshooting, and care tips. Sit back, relax, and let’s celebrate your eyes.
I’ll keep things simple, conversational, and full of detail. Whether you’re new to eye makeup or want to refine your technique, this guide aims to be the one you return to whenever you want reliable instruction and creative inspiration. Every section is tagged and organized so you can jump to the parts that interest you the most.
Why Almond Eyes Are Special
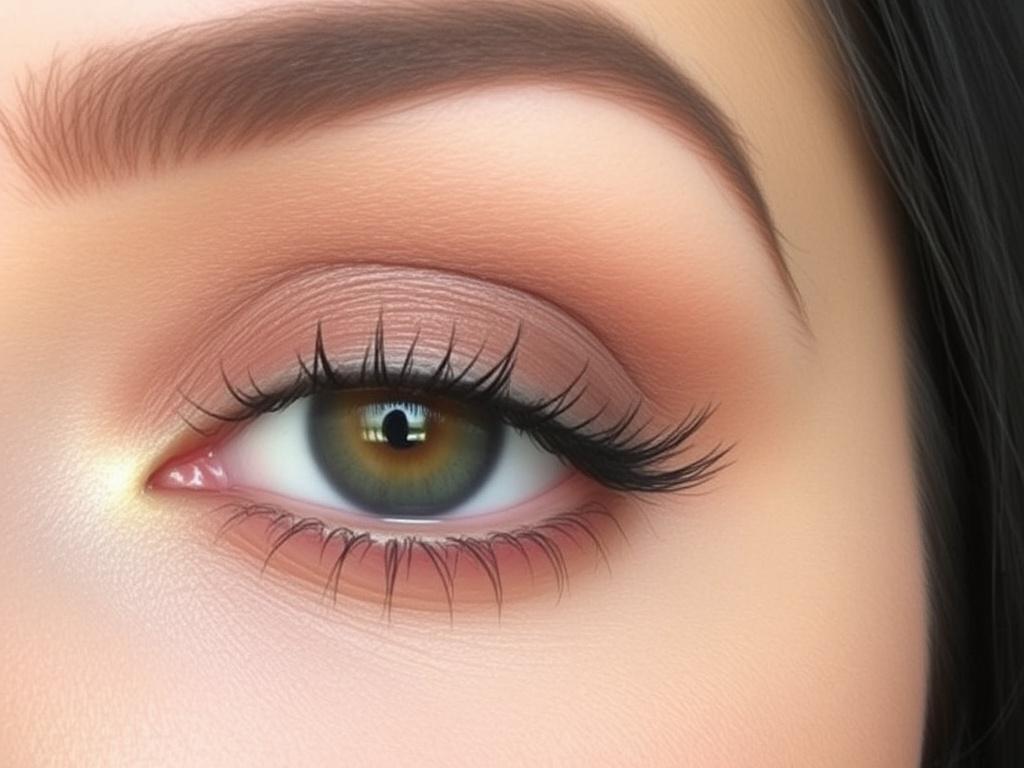
Almond eyes are often considered the “ideal” eye shape in makeup because of their natural balance and symmetry: the iris is touched by both the upper and lower lids, and the outer corner tends to taper slightly upward. That built-in harmony means most techniques—smoky eyes, winged liner, soft glam—work beautifully, usually with minor adjustments.
However, every almond eye is unique: some are deep-set, some hooded, and others wide-set. This guide recognizes those differences and offers adaptable methods so you can pick what fits your features best. Understanding the core principles behind why certain shapes and placements work will give you greater creative freedom than memorizing a single “how-to” step.
Understanding Almond Eyes: Anatomy and Proportions
Let’s break down the anatomy in a friendly, visual way so you’ll know what you’re working with. Knowing these elements helps you decide where to place shadow, where to highlight, and how to shape liner to accentuate the natural silhouette of the eye.
Almond eyes typically have a visible crease and slightly upturned outer corners. The eyelid length is balanced—neither especially long nor very short—and the eyelid skin usually offers a smooth canvas. But again: variations exist. The key is to play to the eye’s natural lines and angles.
How to Identify Almond Eyes
Not sure whether your eyes are almond-shaped? Here are a few characteristics to check:
- Visible iris contact: The top and bottom lids slightly touch the iris on both sides.
- Upturned outer corners: The outer corner tends to point a bit upward, giving a subtle cat-eye silhouette.
- Balanced height and width: The eye isn’t extremely rounded or heavily hooded.
Stand in front of a mirror and look straight ahead. If your eyes meet most of those points, you likely have almond-shaped eyes. If not, don’t worry: many of these techniques still apply—you’ll just adapt certain placements for hooded or deep-set variations (covered later).
Preparing the Canvas: Skin, Brows, and Base
Great eye makeup begins with great preparation. This is both skin care and a simple base that improves product performance and longevity. Preparation doesn’t have to be fancy—just consistent and appropriate for your skin.
Start with clean, well-moisturized skin. Use a lightweight eye cream if you have dryness or fine lines: allow it to absorb before makeup. Then use an eye primer to smooth texture and neutralize any darkness on the lids. A small amount goes a long way—dab and blend with your ring finger or a small brush.
Concealer and Corrector for Uniform Lid Tone
If you have lid discoloration, veins, or a very oily lid that causes shadows, a thin layer of concealer or color corrector will even things out. Apply a thin, sheer layer and set with a translucent powder or a neutral-toned matte shadow to prevent creasing. This creates a blank canvas that lets your color placements be precise and vibrant.
Frame the Eyes: Shaping the Brows
Eyebrows are the frame of the face. Even minimal grooming—brushing, filling sparse areas, and setting—changes the overall impression of the eyes. For almond eyes, a softly arched brow tends to complement the natural eye shape. Fill in gently, using short strokes to mimic hairs, and keep the brows proportionate to your face shape.
Tools and Products You’ll Need
You don’t need a glamorous vanity or designer palettes to achieve beautiful results. A few well-chosen tools and products will take you far. Here’s a practical list and explanation of why each item matters.
- Eye primer – evens out lid tone and prevents creasing.
- Concealer – for under-eye brightening and lid correction.
- Setting powder – to lock concealer in place.
- Eyeshadow palette – a mix of mattes and shimmers across neutral and accent tones.
- Eyeliner – pencil, gel, or liquid depending on the look.
- Mascara – volumizing or lengthening based on preference.
- Brushes – blending brush, flat shader brush, angled brush, smudger, and a small detail brush.
- Individual or strip lashes (optional) – for drama when you want it.
- Makeup remover and gentle cleanser – to safely remove eye makeup.
Essential Brushes and What They Do
Brushes are the unsung heroes of eye makeup. Even inexpensive brushes can do a great job when used properly. Below is an easy-to-read table summarizing useful brushes and their main functions.
| Brush | Main Function | Tips |
|---|---|---|
| Fluffy Blending Brush | Soft, diffused blending in the crease and for transition shades | Use light windshield-wiper motions; build color slowly. |
| Flat Shader Brush | Pressing shimmer or base shade onto the lid | Pat rather than swipe to reduce fallout and intensify color. |
| Small Dense Brush / Pencil Brush | Precise placement in the outer V and lower lash line | Use for defining and smoking out the liner. |
| Angled Brush | Gel liner application and brow filling | Hold at a steady angle for a clean line. |
| Smudger Brush | Softly smudging liner or shadow along the lashline | Blend while the product is still slightly damp for a smoky effect. |
Color Theory for Almond Eyes

Choosing shades that complement your eye color and skin tone makes a huge difference. Color choices can make your eyes pop or appear muted. Let’s simplify the essentials of color theory so you can make confident choices.
Start with a neutral base and add depth in the crease and outer corner. Use a lighter shimmer or satin on the center or inner lid to bring light forward. The most flattering colors are often those that sit opposite your eye color on the color wheel: for example, purples and warm browns for green eyes, warm bronzes for blue eyes, and rich plums or eggplant tones for brown eyes. But personal style matters—if you love a color, experiment.
Color Pairing Table
Here’s an easy table to reference for common eye colors. These are suggestions, not rules—mix and match as you like.
| Eye Color | Flattering Shades | Contrast / Accents |
|---|---|---|
| Brown | Bronze, chocolate, warm burgundy, copper | Plum, deep navy, olive green |
| Blue | Warm browns, taupe, peach, soft bronze | Warm oranges, terracotta, copper |
| Green | Plums, mauves, warm browns, deep bronze | Rich purples, sangria tones |
| Hazel | Warm golds, olive, brown, subtle greens | Deep plum or burgundy for contrast |
Basic Step-by-Step Tutorial for Enhancing Almond Eyes
Below is a fundamental step-by-step routine that suits almond eyes and serves as the foundation for more elaborate looks. This sequence is flexible—adapt the colors and intensity to the occasion.
- Prime the lid and set with a thin powder.
- Apply a transition shade in the crease with a fluffy brush using soft back-and-forth motions.
- Define the outer corner with a deeper shade, blending into the crease while keeping the intensity at the outer third.
- Apply a lid shade (satin or shimmer) to the center and inner lid with a flat shader brush.
- Smudge a medium shade along the lower lash line with a pencil brush for balance.
- Apply eyeliner following the natural lashline; for almond eyes, a slight upward flick at the outer corner enhances the shape.
- Curl lashes and apply mascara, focusing on the outer lashes to emphasize the almond silhouette. Add false lashes if you want more drama.
- Highlight the inner corner and brow bone with a subtle shimmer to brighten and lift.
Each step can be extended into more detailed techniques—later sections break down variations for daytime, winged liner, smoky, cut crease, and more.
Step 1 — Prime and Base
Use a thin layer of eye primer across the lid and into the inner crease. If you want extra coverage, a tiny bit of concealer can neutralize darkness. Lightly set with translucent powder or a neutral-matte shade to reduce creasing and provide a smooth bed for color.
Step 2 — Transition Shade
Pick a neutral matte slightly darker than your skin tone. Using a fluffy brush, apply the color in the crease with windshield-wiper motions. For almond eyes, concentrate the transition slightly above the crease to create a lifted effect, but avoid going too high. Build color gradually—soft layers are easier to blend than a heavy initial deposit.
Step 3 — Define the Outer Corner
Use a small dense brush to place a darker shade at the outer third, forming a soft “V” shape that follows the eye’s natural angle. This step creates depth and helps draw the gaze outward, enhancing the almond silhouette. Blend the edge so the V softens into the transition shade—harsh lines will flatten the look.
Step 4 — Add Lid Color
Choose a satin or shimmer for the lid. Apply it with a flat shader brush or your fingertip for higher pigment payoff. Place the color on the center and inner lid, leaving a little space near the outer V so the depth created earlier still shows through. For more precision, mix a tiny bit of setting spray with the shadow on the brush to intensify metallics.
Step 5 — Lower Lash Line
Balance is key. Use a pencil or small smudger brush to apply a medium shade along the lower lash line, focusing on the outer two-thirds for an elongated effect. Keep the inner corner clean or lightly smudged to avoid closing the eye.
Step 6 — Eyeliner
Eyeliner can augment the almond shape beautifully. A thin line along the upper lashline adds definition without overpowering the shadow work. For a classic enhancement, extend the liner slightly upward at the outer corner—this mimics and amplifies the natural upturn of almond eyes. Gel liners are forgiving and blendable, while liquids give a crisp edge. Pencils offer a softer finish.
Step 7 — Mascara and Lashes
Curl lashes to lift them and apply mascara starting at the roots. Wiggle the wand and sweep upward, concentrating on the outer lashes if you want to accentuate the almond pull. If using false lashes, choose styles that are tapered—shorter on the inner corner and longer on the outer—to enhance the eye shape rather than obscure it.
Step 8 — Highlighting
A soft iridescent or champagne highlight in the inner corner and under the highest point of the brow arch brings brightness and a lifted look. Keep it subtle for daytime and more pronounced for evening looks.
Natural Daytime Look for Almond Eyes
Not every day calls for dramatic makeup. A natural look enhances your almond eyes with subtlety and freshness—perfect for work, daytime events, or when you just want to look polished without heavy makeup.
This approach emphasizes soft neutrals, a gentle definition in the crease, and a tidy lash line. The goal is to enhance what’s already beautiful about the eye without creating heavy contrast.
Step-by-Step Natural Look
- Prime and set the lid with a neutral matte powder to prevent creasing.
- Apply a soft beige or warm taupe transition color in the crease with a light hand.
- Use a slightly deeper matte (soft brown) on the outer third to provide subtle depth.
- Swipe a satin cream or soft gold on the eyelid for a healthy glow.
- Lightly apply brown pencil liner tight to the upper lashline to define lashes without a heavy line.
- Smudge a tiny bit of the outer lid shade along the lower lash line for balance.
- Apply one or two coats of mascara; curl lashes beforehand for lift.
- Finish with a touch of inner corner highlight and groomed brows.
This look is all about gentle enhancements—soft edges, natural shades, and clean lashes. It’s quick, flattering, and can be finished in a matter of minutes once you’re comfortable with the sequence.
Classic Winged Eyeliner for Almond Eyes
Almond eyes naturally lend themselves to winged liner: the slight upturn at the outer corner makes the cat-eye exceptionally flattering. The trick is to let the line follow the eye’s natural angle rather than making a forced flick that’s too high or dramatic.
There are many ways to wing eyeliner: pen/liquid for crisp edges, gel for control and smudge-ability, or even a kohl pencil for a softer look. I’ll describe a dependable method that works with most products.
Step-by-Step Winged Liner
- Start with a thin line at the inner corner, staying as close to the lash line as possible.
- Draw the wing by imagining a line that continues from the lower lash line—this keeps the wing aligned with the eye’s natural angle. The wing’s endpoint should point gently upward, not straight out or overly high.
- Connect the wing to the main lashline with a small triangular shape, then fill it in.
- Thicken the line gradually toward the outer corner to balance with the wing. Keep the inner line thin to avoid overpowering the eye.
- If you prefer a softer look, smudge the liner slightly with a small smudger brush and a tiny bit of shadow.
Practice makes perfect here. Start with small wings and build to your ideal length and thickness. For almond eyes, a medium-thin wing that extends slightly beyond the outer corner beautifully complements the natural shape.
Smoky Eye for Almond Eyes
The smoky eye is a classic for a reason: it’s sultry, sophisticated, and flatteringly shapes the eye. Almond eyes are particularly well-suited to smoking out the outer corner and lower lash line to produce an elongated, smoldering look.
There are different takes on smoky eyes: monochromatic (same tonal family), two-tone, or high-contrast. A monochromatic warm brown smoky look is a universally flattering option and a great place to start.
Step-by-Step Smoky Eye
- Prime and set the lids to ensure the smoky pigments blend smoothly.
- Apply a medium-toned transition shade in the crease and slightly above, using circular blending motions.
- Place a darker matte shade on the outer V, blending into the crease and along the upper lashline.
- Use a slightly shimmery or satin shade on the lid center for contrast, or keep it matte for a totally sultry look.
- Smudge dark shadow or pencil liner along the lower lash line and connect it to the outer V to create continuity.
- Blend, blend, and blend: the smoky eye demands soft edges. Use clean brushes to diffuse any harsh lines.
- Finish with tightlining the upper waterline and a couple of mascara coats—or add false lashes for extra drama.
Keep in mind that smoky eyes are flexible. Adjust pigment placement—lower for a more cat-like pull or higher in the crease for a lifted effect—based on your desired look.
Cut Crease for Almond Eyes
Cut creases create dramatic contrast between the lid and crease, offering a defined, graphic look that can be playful, glamorous, or editorial. Almond eyes can carry a cut crease beautifully because their visible crease line provides a natural guide for the cut.
Patience and a steady hand help here. Using a concealer to “cut” the crease gives the lid a crisp, clean canvas for a contrasting lid shade or glitter. Let’s walk through a controlled method.
Step-by-Step Cut Crease
- Prime the lid so the concealer used for cutting the crease adheres properly.
- Apply a transition color and a darker crease shade to define the natural crease line. Blend the edge outward to soften harsh lines but maintain a clear crease shadow.
- With a small, flat brush and a creamy concealer, trace a clean line along the crease where you want the “cut” to be. Pat gently to lift the shadow off the lid without disturbing the outer V.
- Pack a contrasting lid shade (matte or shimmer) onto the concealed lid. Glosses or metallics work well over the cut crease for high impact.
- Define the outer corner and connect the crease shadow to the liner for a finished look. Add a thin or bold liner depending on preference.
- Complete with mascara and optional lashes. Keep the brow highlight minimal so it doesn’t distract from the crisp crease.
Because the cut crease relies on sharp contrast, take care with blending: the outer edges should be soft and diffused, while the cut remains crisp.
Soft Glam and Evening Looks
Soft glam is the sweet spot between subtlety and glamour. For almond eyes, it emphasizes the outer corner and plays with shimmer in the center of the lid for a glowing, camera-ready result. Evening looks intensify color and contrast, often incorporating deeper shades, richer metallics, and bolder liner.
When building an evening look: start with the natural or smoky base, deepen the crease, add a brighter or more reflective lid tone, and finish with strong liner and lashes. Focus shimmer on the center of the lid to catch light and draw attention to the iris.
Elements of a Soft Glam Look
- Warm, neutral transition shades for a soft glow.
- Deep outer corner shadow to sculpt without harshness.
- Metallic or pearl center-lid highlight for dimension.
- Defined but not overly dramatic liner—consider a soft smudged wing.
- Full lashes and clean brows for balance.
Adapting Techniques for Different Variations of Almond Eyes
Not every almond eye is the same. Here’s how to tweak placements and techniques for common variations: hooded almond eyes, deep-set almond eyes, and wide-set almond eyes.
Hooded Almond Eyes
Hooded eyes have skin that folds over the natural crease, which can hide crease work when the eye is open. For a flattering approach:
- Apply transition shades slightly above the natural crease so the color shows when your eyes are open.
- Keep darker shades concentrated on the outer corner instead of deep in the fold.
- Use thin liner and avoid heavy lids of dark matte that can close the eye.
- Highlight the center of the lid to bring focus forward.
Deep-Set Almond Eyes
Deep-set eyes sit further back in the skull, creating more shadow under the brow bone. To counteract this and bring the lid forward:
- Use lighter lid shades and avoid very dark colors all over the lid.
- Place transition and crease shades slightly higher and blend upward to open the eye.
- Add inner corner and center-lid highlights to increase the appearance of depth toward the front.
Wide-Set Almond Eyes
Wide-set eyes have more space between the eyes. To visually bring them closer together:
- Concentrate darker shades toward the inner half of the lid and along the inner lower lash line.
- Use mid-to-dark shades near the inner corner to create the illusion of inward pull.
- Keep the center of the lid light to maintain brightness without emphasizing distance between the eyes.
Eyeliner Types and How to Use Them
Eyeliner choice affects the look dramatically. Here’s a quick rundown of common types, their strengths, and when to use them.
| Eyeliner Type | Strengths | Best Uses for Almond Eyes |
|---|---|---|
| Liquid | Sharp, precise lines; long-wearing | Strong winged looks, graphic lines, dramatic evenings |
| Gel | Control, smooth application; can be smoked out | Versatile for soft wings, smoky liner, or crisp lines depending on brush |
| Pencil | Soft, blendable; easy to smudge | Natural definition, smoky looks, lower lashline smudging |
| Kohl | Saturating pigment; dramatic when set | Smoky evenings or for tightlining to create dense lash appearance |
Tightlining Technique
Tightlining—applying liner to the upper waterline—gives the illusion of fuller lashes without a visible line. For almond eyes, especially if you want to preserve natural shadow work, tightlining is an elegant trick. Use a creamy, waterproof pencil and gently lift the lashes to access the waterline. Apply a couple of small dabs and press slightly to set.
Applying False Lashes and Choosing Styles
False lashes can elevate almost any look, but choosing the right style is crucial. For almond eyes, lashes that are longer toward the outer corner enhance the eye’s natural cat-like shape. Avoid uniformly thick strips that can cover eye shadow detail.
Choosing Lash Styles
- Tapered lashes: shorter on the inner corner, longer on the outer—perfect for almond eyes.
- Wispy lashes: add texture without heaviness; great for soft glam or natural looks.
- Dramatic volume lashes: best for evening looks where the rest of the makeup is bold.
Application Tips
- Measure and trim the lash band to fit your eye width—always trim from the outer edge.
- Apply a thin layer of lash glue and wait 20–30 seconds until tacky.
- Using tweezers or a lash applicator, place the band as close to your natural lashline as possible.
- Press gently to secure, and blend with a thin line of liner if needed.
- Coat your natural and false lashes with a light mascara to meld them together.
Mascara Techniques for Almond Eyes
Mascara can be adjusted depending on the effect you want. For almond eyes, focus on lift and outer emphasis to complement the natural shape.
- For lift: curl lashes and apply at the roots with upward zig-zags to separate lashes and build volume.
- For elongation: apply slightly more product to the outer lashes; use a combing wand for definition.
- For drama: a volumizing formula plus a lengthening top coat will maximize impact.
Common Mistakes and How to Fix Them
Even experienced makeup lovers have mishaps. Here are common issues and how to fix them quickly so you can get on with confidence.
Too Much Product in the Crease
Fix: With a clean, fluffy brush, blend upward and outward using light strokes. Add a lighter transition shade to help diffuse the darkness. If the color is very intense, a touch of concealer on the lid can reset your canvas.
Wing Too High or Harsh
Fix: Soften the edge with a tiny bit of matching shadow and a small smudger brush. If it’s too high, hide the wing by extending shadow over it or re-draw a lower wing and blend the intersection.
Lines Are Patchy or Uneven
Fix: For gel or liquid lines, use short, connected strokes rather than one continuous motion. For pencil lines, sharpen before use or warm the pencil slightly between your fingers for smoother application.
Makeup Removal and Eye Care
Removing eye makeup gently is as important as application. The delicate skin around the eyes doesn’t need heavy tugging or harsh products. Use a gentle, oil-based remover or micellar water on a cotton pad. Hold the pad for a few seconds to dissolve mascara and liner, then wipe gently. Finish with a gentle cleanser and a hydrating eye cream to maintain skin health.
Avoid sleeping with makeup on—product left on the lashes and lid can cause irritation, inflammation, and breakouts. Clean tools like brushes and lash applicators regularly to prevent bacterial buildup.
Practice Routine: Build Skills Over Time
Makeup is a skill that improves with practice. Create a simple routine to build muscle memory and confidence. Pick a look and repeat it several times, varying one element—liner thickness, shadow intensity, or lash style—so you learn cause and effect.
Practice with good lighting and a magnifying mirror if needed. Take photos in natural light to evaluate how your makeup reads on camera versus in person. With a few weeks of consistent practice, you’ll notice faster application and more predictable results.
Troubleshooting FAQ

Q: My eyeliner and shadow fade during the day. What helps?
A: Make sure you prime the lid and set creams with powder. Use long-wearing liners and set pencil or kohl liners with a matching shadow to lock them in place. Also, consider a waterproof mascara or formula suited for your skin type.
Q: How can I make my lashes look fuller without false lashes?
A: Tightline the upper waterline, use a volumizing mascara, and apply two thin coats rather than one heavy one. Wiggle the wand at the base of the lashes to deposit product at the roots, which visually thickens the line of lashes.
Q: I have oily lids—why do my crease colors disappear?
A: Use a primer formulated for oily lids and set your base with a thin layer of translucent powder. Consider cream-to-powder formulas that are long-wearing and resist moving on oily skin.
Table: Quick Reference for Looks
This table summarizes the essentials for several signature looks so you can pick a path quickly.
| Look | Key Shades | Eyeliner | Lashes |
|---|---|---|---|
| Natural Daytime | Warm taupe, soft gold | Brown pencil, tightline only | None or natural wispy |
| Classic Wing | Neutral matte crease, satin lid | Liquid or gel winged | Moderate, tapered lashes |
| Smoky | Charcoal, deep brown, muted shimmer | Smudged pencil or kohl | Full volume lashes |
| Cut Crease | Contrast matte crease, metallic lid | Thin crisp liner or none (let crease speak) | Flared, voluminous lashes |
Health and Safety Notes

Use clean hands and tools. Replace mascara every 3–4 months and avoid sharing eye makeup to reduce the risk of eye infections. If you experience redness, itching, persistent tearing, or pain after makeup application, remove the products immediately and consider consulting an eye care professional.
Practice Looks to Try (10 Simple Ideas)
Here are some approachable looks to try in sequence as you build technique. Each one introduces a different concept or placement so you can expand your skill set intentionally.
- Soft brown wash across lid + brown tightline for everyday polish.
- Neutral crease + champagne center-lid shimmer for brightness.
- Subtle outer V with deep plum for a date-night eye.
- Thin, short wing + natural lash for a lifted look.
- Smudged pencil all around for a grunge, smoky vibe.
- Soft cut crease with a metallic lid for wedding or formal events.
- Two-tone lid (light inner, dark outer) to practice contrast.
- Lower-lash emphasis only—no upper shadow—to learn balance.
- Double liner (a thin black line plus a tiny gold line above) for a creative twist.
- Glitter or gloss on the center lid combined with a matte outer corner for editorial flair.
Shopping Guide: What to Look For
When you’re selecting products, prioritize formula and texture over packaging or trendiness. Here are some tips to simplify shopping.
- Eyeshadow palettes: Look for a mix of mattes for transition and depth plus 1–2 shimmers for lid light.
- Primer: Choose one suited to your skin—hydrating for dry skin, mattifying for oily skin.
- Liner: If you’re a beginner, a retractable pencil is forgiving. For precision, try a gel liner with an angled brush.
- Mascara: If you have sensitive eyes, look for ophthalmologist-tested formulas.
- Brushes: Invest in a few good-quality brushes rather than a large set of poor ones—especially a good blending brush and a small shader.
Final Thoughts and Encouragement
Almond eyes are an incredibly versatile and flattering shape that respond beautifully to a wide range of makeup styles. The real secret is understanding the natural lines your eyes already have, and working with those lines to enhance them. Start with the basics, practice consistently, and don’t be afraid to experiment. Makeup is both creative and practical: the best look is the one that makes you feel confident and expresses your personality.
Whether you aim for a subtle everyday enhancement or a dramatic evening statement, these techniques will help you draw out the natural strengths of almond eyes. Remember: there are no absolute rules—only guidelines to help you achieve your vision. Have fun, take pictures along the way to track progress, and enjoy the process of creating looks that are all your own.
Thanks for reading. If you’d like, tell me which look you want to master first, and I’ll give you a focused mini-tutorial with product-free alternatives and troubleshooting tips tailored specifically to your features.